Hot rolls are the secret to the best hair in your life
From Mormon midi heels to stirrup leggings (yep, for reals), the fashion world currently loves our mothers to see once loved. And now the beauty world is beginning to enter into love as well. Need proof? Hair rollers (both hot and velcro) make waves, and whoa mom, they are wonderful. But not all rolls are created equally. Browse below to see why we stand for this beauty method for old school, and which is right for you.
HOT ROLLERS
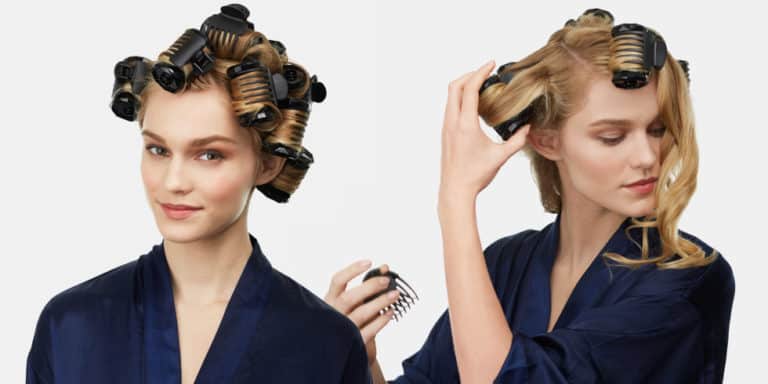
First, hot rolls! These long-lasting, advanced tools are the secret to keeping the volume while the harsh winter winds whip your hair back and forth. Trust us: They're not just for bouncing, pristine ripples anymore. You can use them to create simple, casual waves or to channel Gisele-inspired cotton hair.
Here is the technique: Start with the highest center of your hair. Hold a two-inch wire vertically and start rolling all the way down to the root. Secure each roll with a clip. Create a "mohawk" of scrolls at the bottom of the top center of the head. Then focus on the pages. Hold out two-inch pieces horizontally and roll the rollers in toward the root, with the circle of the roller facing toward your mirror. Set, unroll, allow to cool and brush out for the perfect finish. Do you need a visual aid to map your reels? We love this tutorial from YouTube Beauty Vlogger and hairstyle Silvia Reis.
HOT ROLLERS
First, hot rolls! These long-lasting, advanced tools are the secret to keeping the volume while the harsh winter winds whip your hair back and forth. Trust us: They're not just for bouncing, pristine ripples anymore. You can use them to create simple, casual waves or to channel Gisele-inspired cotton hair.
Here is the technique: Start with the highest center of your hair. Hold a two-inch wire vertically and start rolling all the way down to the root. Secure each roll with a clip. Create a "mohawk" of scrolls at the bottom of the top center of the head. Then focus on the pages. Hold out two-inch pieces horizontally and roll the rollers in toward the root, with the circle of the roller facing toward your mirror. Set, unroll, allow to cool and brush out for the perfect finish. Do you need a visual aid to map your reels? We love this tutorial from YouTube Beauty Vlogger and hairstyle Silvia Reis.
Our Best Choice for Hot Rollers : If you can't give up your tried-and-true curling iron (we'll get it completely), consider adding Velcro to your routine to bump up the volume. The small, self-sufficient wonders will set your locks and, depending on the circumference of the roller, will give you loose waves (choose larger rolls) or large curls (choose smaller rolls).
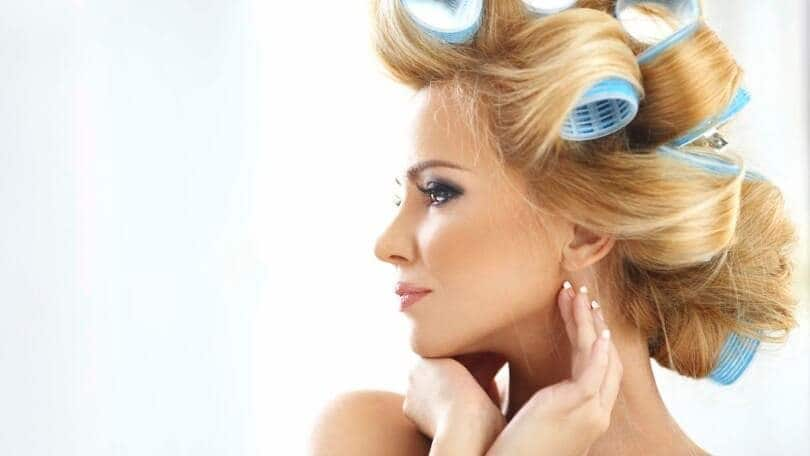
VELCRO ROLLERS
Let's break it down: Section and curl your hair how you usually do. After you have curved a piece, follow it up by rolling a Velcro strap obliquely down towards the root. Secure the roller with a bobby pin or clip. Follow the same procedure as you would with hot rolls. Start with the top and the center point (remember "mohawk?") And then work through the pages. Or take a cue from YouTube Beauty Blogger Dacey Cash and focus on your crown first. Let the rollers sit for 20-30 minutes, roll out and brush out for a natural effect.
For further info visit kalistasalon.com
Bentonite Clay Recipe
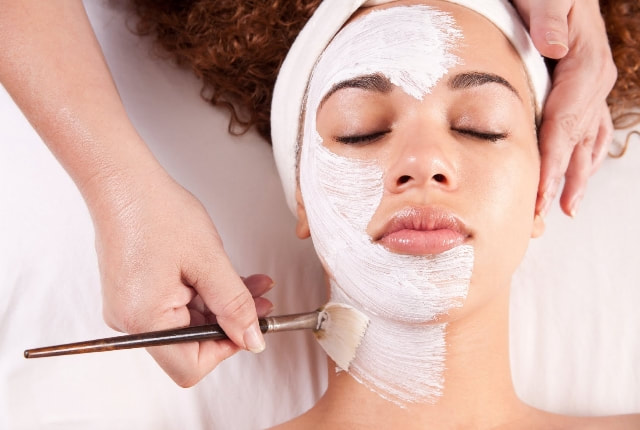
facial Cleansing
A deep cleansing face mask can be used on most skin types. If you have poor acne, use the mask every week. Otherwise, apply the mask once a month. To create the mask, mix some bentonite clay with some green tea in a medium bowl. Prepare the tea according to the package instructions. Green tea is good for the skin because it contains antioxidants. According to the University of Maryland Medical Center, antioxidants remove free radicals, which are harmful compounds in the body that alter cells, manipulate with DNA and can even kill cells. Add 1 tbsp. of aloe vera to complete the mask and mix well. Apply to your face and let the clay dry. Rinse with warm water.
exfoliation
Good skin care begins with exfoliation. Dead skin cells can clog pores and cause the skin to have a rough and uneven appearance. Create an exfoliation mask from bentonite clay by mixing some clay with some apple cider vinegar in a medium bowl. Apple cider vinegar removes the dead skin cells, and when mixed with water in equal parts, it can also be used as an astringent. Add xBD; cup of papaya pulp and mix thoroughly. Rub the mixture on your face and allow the mask to dry for 10 minutes. Remove by gently rubbing the mask in a circular motion with a wash cloth moistened with warm water. Rinse well and pat the skin dry with a clean towel.
foot mask
Calluses and stains of dry, rough skin shape on the feet to protect them from standing and walking pressure. A simple foot mask can remove a lot of dry and dead skin, so the feet feel soft and touchable. Create a bone mask from bentonite clay by mixing two parts of clay with one part of distilled water in a medium bowl. Add some olive oil and 3 tbsp. of coherent salt to help remove the dead skin cells. Rub the mixture on your feet, cover your toes and let the mask dry. Remove the mixture by cleaning with warm water and a wash cloth. Rinse well. Bentonite clay is volcanic glass that has changed to form clay minerals. Sodium bentonite is used in cosmetics because it absorbs large amounts of water, allowing it to expand many times over its original size. Clay masks are a great way to clean and moisturize your face and body. Bentonite clay can be used to create a variety of facial and body masks. While these masks begin with the clay, the results are dependent on the additional ingredients
